
If you’re using webmail from Sonic and email messages are ending up in your Spam folder that you don’t want there, you can add email addresses to your trusted senders list (also known as a white list or safe sender list) to keep that from happening. Messages sent from your senders on your whitelist will not be sent to your Spam folder.
Add an email address to the whitelist
Sonic uses spam filtering services from SpamAssassin. To keep desired messages out of your spam folder, you can whitelist specific email addresses. To access your whitelist entries:
- Sign into your Sonic mailbox
- Select Email
- Select Spam Filtering
- Under Whitelists/Blacklists, next to Whitelist From enter the email address of desired sender
- Select the Add Whitelist Entry button

With the email address added to your whitelist, new email received from that sender will be delivered to your inbox!
Whitelist a subject
You can also prevent email messages with certain keywords in the subject line from being sent to spam. This is useful if you expect to receive automated messages with similar subject lines, but from different senders.
- Sign into your Sonic mailbox
- Select Email
- Select Spam Filtering
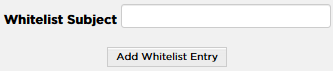
- Under Whitelists/Blacklists, next to Whitelist Subject the word(s) or phrase in the subject line of email messages you want to whitelist
Did this guide work for you?
Let us know if this guide for Sonic Webmail worked for you by leaving a comment below. While we strive to keep our guides up-to-date and relevant, sometimes things change without notice. If you find something is different in your Sonic Webamil account that differs from this guide, let us know what you had to do differently. Thanks for your help and input!
Photo by Compare Fibre on Unsplash