
Email is an essential communication tool and nearly everyone has an email address (or three), but it’s ubiquitous nature makes it a popular target for unsolicited marketing messages, also known as spam. To combat this, email providers utilize sophisticated filters that attempt to sort the legitimate email (ham) from the unwanted messages (spam).
Spam filtering is an excellent tool email providers use to help manage the unending flow of unwanted email messages sent every day. Often, this process happens silently behind the scenes, but the process can become very apparent when you don’t receive a message you need. As good as spam filters are, mistakes can be made.
To keep your inbox clean from unwanted emails and to help protect you against malicious messages, PenTeleData uses spam filtering from SpamAssasin, a third-party drop-in solution. When messages go to the spam/junk folder, or when you want to make sure future messages don’t end up in junk, there’s a couple things you can do: mark messages as not junk and manually add the sender’s email address to your white list (or list of allowed senders). We’ll discuss these in more detail below.
Mark a message as not junk
Suspect spam messages are sorted into your junk folder. If a message you’re expecting to receive doesn’t arrive in your inbox after a few minutes, the junk folder is the first place you should look for that message. You should routinely review your junk mail folder to see if legitimate mail ends up there by mistake. If you find a message in your junk mail folder that should’t be there, you can mark it as not junk to move the message to your inbox and train the filter to allow messages from that sender in the future.
- Login to PenTeleData Webmail from a computer
- Go to your Junk folder
- Find and select the desired message
- Select the Not Junk button at the top
The message will be moved to your Inbox and future messages from that sender will not be sent to junk.
Note: If you select Not Junk by mistake or on the wrong message, you can simply select Junk again on that message to send it back to junk and block messages from that sender.
Add an email address to the allowed list
If you’re expecting to receive an important message from a specific sender or otherwise want to preemptively ensure messages from a specific sender never end up in the junk folder, you can add the sender’s email address to your “allowed” list.
- Login to PenTeleData Webmail from a computer
- Select Preferences from the top navigation menu
- Select Mail from the left navigation menu

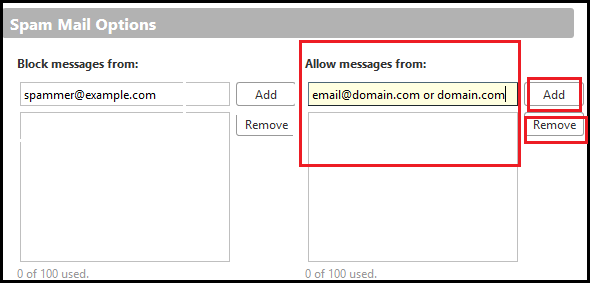
- Scroll down to the Spam Mail Options section
- Under Allow messages from enter the sender’s email address or domain and select the Add button
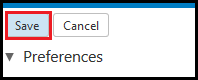
- Select the Save button
Now messages from that single sender or whole domain will be routed to your inbox and never the junk folder.
For more help
Receiving
If you need more help receiving email messages as a PenTeleData WebMail user, visit the PenTeleData customer Help Desk.
Sending
If you’re an email sender having trouble sending email to PenTeleData (ptd.net) recipients, visit the PenTeleData postmaster RBL information page.
Did this guide work for you?
Let us know if this guide for PTD Webmail worked for you in the comments below. While we strive to keep our guides up-to-date and relevant, sometimes things change without notice. If you find something is different in your PenTeleData Webmail account from this guide, let us know what you had to do differently. Thanks for your help and input!